How to Set Up ChatGPT-4 Service Using GitHub Copilot
This article has expired, please do not use it
GitHub Copilot is a AI assistant developed by GitHub to help developers write code. It is a Visual Studio Code plugin based on OpenAI Codex, providing features such as code suggestions, auto-completion, auto-fixing, and auto-refactoring. Currently, GitHub Copilot also supports chat functionality, powered by GPT-4. However, it is only available within the context of VS Code. In this article, I will explain how to set up a chat service using GitHub Copilot, allowing you to use it anywhere.
Open-Source Components
- ChatGPT-Next-Web: A well-designed, cross-platform ChatGPT web UI with support for GPT3, GPT4, and Gemini Pro.
- copilot-gpt4-service
- An AWS EC2 server is needed to run the copilot-gpt4-service, but you can choose any cloud service provider you prefer or run it locally.
- Vercel: A free static website hosting service to deploy the ChatGPT-Next-Web service.
- Cloudflare: A free CDN service used for domain name resolution.
Obtaining the GitHub Copilot Token
Please refer to this document, GitHub Copilot Token. On a Mac, you can use the following command to obtain the token:
1 | bash -c "$(curl -fsSL https://raw.githubusercontent.com/aaamoon/copilot-gpt4-service/master/shells/get_copilot_token.sh)" |
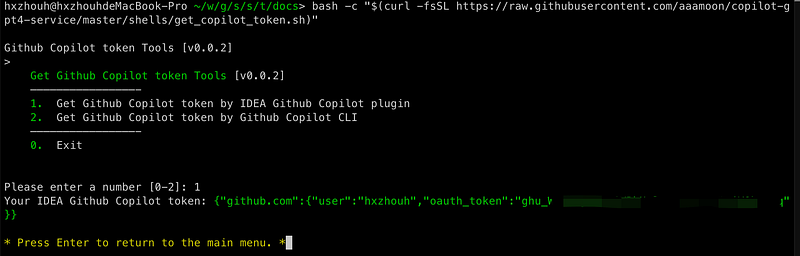
As shown in the screenshot, you need to copy the token to the clipboard for later use.
Running the copilot-gpt4-service
- The copilot-gpt4-service supports Docker deployment, and the official project provides a docker-compose file. You only need to modify the environment variables.

- Add a server block in NGINX:
1 | server { |
Don’t forget to reload the NGINX configuration file.
- Add a domain name resolution for “chat.example.com” on Cloudflare, pointing to the IP address of your NGINX server.
Deploying the ChatGPT-Next-Web Service on Vercel
ChatGPT-Next-Web supports one-click deployment to Vercel. You don’t need to make any changes.
Once the deployment on Vercel is complete, you can add a custom domain name, such as “chatnext.example.com”.
Testing
Open your browser and enter “chatnext.example.com”. Click on the settings button in the bottom left corner and select “Custom Interface”. Enter " https://chat.example.com" as the API endpoint, and use the GitHub Copilot token copied in the first step as the API token. Click on “Save”, and you can start chatting.